Monday, 9 September 2013

Mani Mondays: French Manicure


Hello beauties, I hope you are all well. I'm settling into my new house and I've got job interview tomorrow morning so I decided to give myself a French manicure in preparation. I always think french tips look so elegant and classy so they are the perfect nail art to wear to a interview.
I know some people like to draw a straight white line across the top of their nails but because I keep mine long and oval shaped that doesn't look write and is better suited to square of squoval shapes. I'm not very good at French tips however, my hand isn't steady enough, so I do cheat by using stencils. I picked up Nailene Perfect Tips from Superdrug this morning for just over £3 - and the pack contains 96 guides - and they seemed to have worked well. I will mention though be careful when peeling them back otherwise you will remove the polish underneath.


I used

  • Rimmel Nail Nurse nail base & top coat £4.49
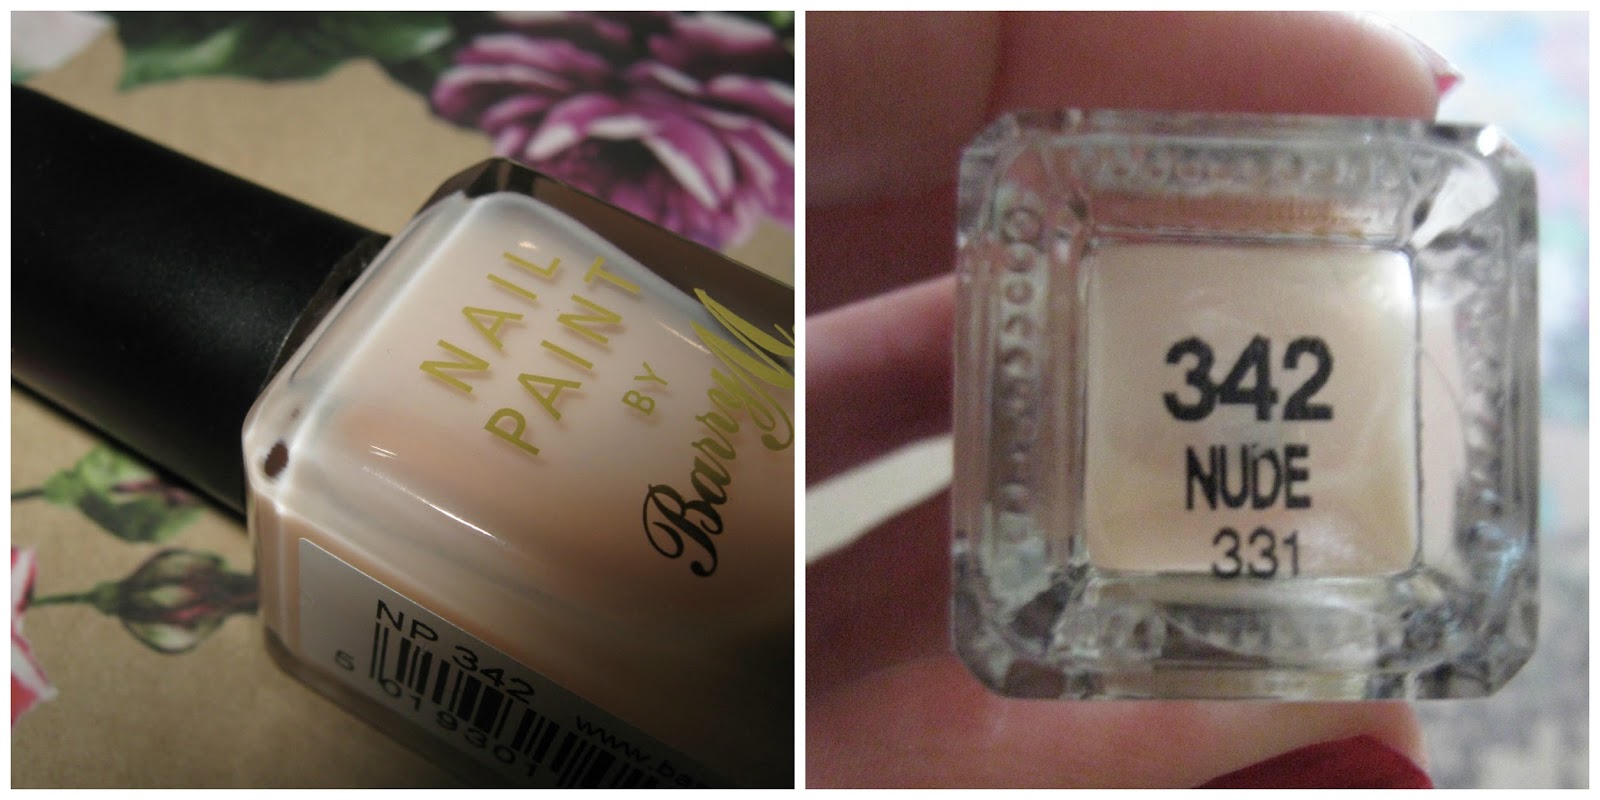
  • Barry M in "Nude" £2.99
  • Barry M in "Matte White" £2.99
  • Nailene Perfect Tips
Instructions
  • Prep your nails by making sure any polish is thoroughly removed, you don't want any traces showing through your manicure
  • Apply 2 coats of Barry M "Nude" and leave to dry
  • Apply the nail strip - if using - to the tip of nail, leaving the gap you want to paint white.
  • Apply Barry M "Matte White" to the nail, above the strip, or paint on in a curved or straight line depending on which look you want to go for.
  • When the white is dry remove the nail strips carefully, if they have been used, and apply another coat of Rimmel Nail Nurse.
Do you like French tips? Have you come across any interesting ways to jazz the look up?

Beth xx

Sunday, 8 September 2013

Stress Free Sundays: Hair masks

Welcome to another new weekly feature on my blog, Stress Free Sundays. To me, Sundays can seem like the most stressful day of the week. Not because I'm particularly busy on that day, but because it marks the end of a busy week and the start of new one.
I've always been a person who worries, I can remember getting stressed out over my Year 6 SATs, but last year I tried to be a bit more laid back and this year I'm trying even harder. I don't think there's anything wrong with a little bit of stress now and then, it keeps you on your toes, but worrying all the time - especially about things that can't be helped - is awful. It's bad for your health, disrupts your sleeping and eating patterns and - at least for me - leads to a nasty acne break out. With all that in mind every week I'm going to spend my Sunday evening doing something relaxing and sharing it with you guys.

Tigi Catwalk Oatmeal & Honey Intensive Nourishing Mask*

I've just moved into my new house for the final year of university. My dad and sister stayed with my for the first night to help me get settled in, but now they've gone and everything's been unpacked the house is very quiet and I've got a lot on mind about workload for this uni year.
I've decided to treat myself this evening to a hair mask. They are a great once-a-week addition to your bath/shower routine when you're running short on time, giving you an excuse to the enjoy the warm water for an extra five minutes. However if you have part of your evening to spare then apply to damp and hair and settle down with a good book or catch up on some TV (an old episode of True Blood for me).
My current favourite is Tigi Catwalk Oatmeal and Honey Intense Nourishing Mask. It smells amazing! I'm usually not that keen on honey scented products but this one has the balance just right and it smells a little cinnamon-y as well. This mask is great for anyone with dry or damaged hair. I regularly use a hair-dryer and straighteners on mine so this masks helps to add some much needed moisture, especially at the ends.
If your coloured hair is in need of some extra care then John Frieda do a great range of masks, and the Aussie 3 Minute Miracle range is great for when the clock is ticking. Not only will your hair thank you for the TLC but it also gives you some time to forget about the stresses and strains of the week.

How do you like to relax on a Sunday evening?

Beth xx

Friday, 6 September 2013

Sally Hansen No Chip Acrylic Top Coat


A top coat was never something I really bothered with, I mean I only recently got in on the whole base coat act after being fed of having stained nail beds. But having a top coat really does help your nail polish last the whole week so on one of my visits to Boots a couple of months ago I decided to pick up this top coat by Sally Hansen.
Now there's a reason why I've waited so long to post this review, because I really wanted to give this polish a chance but unfortunately it just isn't working for me. Every time that I've applied this top coat it has made my polish crack which just makes it peel off easier. Not at all what I was expecting from an Acrylic Top Coat. I actually dithered between this and another Sally Hansen top coat for a few minutes, knowing me I probably walked round the store with both bottles and then made an impulse choice between them at the checkout.
I have tried this polish over Barry M, Models Own and Essie nail polishes and nearly every single time it has made the polish crack and completely ruined the look. My housemate tried it out over a Models Own polish and was also disappointed to find her nails ruined.
Like I said, I waited to post this review because I really wanted to make sure that the top coat wasn't working. I checked my nails were fully prepped, the colour polish was completely dry and tried several brands but the same problem keeps happening. Perhaps it's only meant for Sally Hansen polishes, but I do wish it had said that on the box!

Have you tried any better top coats? Or is there somewhere I'm going wrong with this one?

Beth xx

Leibster Blog Award

The lovely ladies over at 20/30 GLAM very kindly nominated me for a Leibster Blog Award. I've only recently discovered this fantastic blog, run by Ashley and Julie, after they left me several lovely blog comments so I encourage you all to head over to their page and start reading!

So what is the Leibster Blog Award?
It is a German word meaning favorite, dearest or beloved. The Liebster Award is a great way to raise your blog's profile and is perfect for blogs which are new or small. This helps blogs get new followers as well as helps you to find new and interesting blogs to nominate! 
The rules:

You have to link back to the person that nominated you.
You must answer the 11 Liebster questions given to you by the person who nominated you.
You have to nominate another 11 bloggers who have under 200 followers to pass the award to.
You have to come up with 11 other questions for your nominees.
You have to notify the bloggers whom you have nominated.
Some bloggers can also include 11 random facts about themselves but this is optional.

Here are my questions from 20/30 GLAM

1. What made you want to start blogging?
I'm currently at university doing a degree in journalism, so a blog is good place for me to practice my writing and also build up my portfolio. I'm also a huge beauty junkie so here I can ramble on about everything I love and get to meet lovely like minded people in the process
2. What are your top 5 fave blogs?

Picking just five blogs is so hard! But at the moment I've enjoyed reading What I Heart Today, LLYMLRS, The Nailasaurus, Tattologist and Vivianna Does Makeup
3. Who is your hero and why?

My parents! They've done so much for me and my brother and sister. They've always supported us and encouraged us to aim high. I appreciate them so much more now that I live away from home.
4. Favorite Actor/Actress?Ryan Gosling - because he's beautiful - and Keira Knightley. 
5. Favorite 3 movies?

Gangster Squad, The Green Mile and Bridget Jones. Although I did see "About Time" in the cinema yesterday which was amazing and I encourage you all to go and see! But I don't think it counts seeing as it's just come out.
6. What is your fave makeup brand?

I love Benefit, the products are always great quality and the packaging is so pretty. Sometimes it's a bit out of my student price range so drugstore wise it would be Bourjois or Maybelline.
7. Describe your style in three words.

Constantly ever changing! I can never stick to a style a like for very long, I'm always swayed by my friends' beautiful clothes of blog lookbooks.
8. Married or single? If married, how long?

Single and have been for a year now.
9. Fave place to vacation?

We don't do a lot of vacations but we did have a lovely holiday in Cyprus so I'd love to go there again.
10. What are your hobbies/Interests?I love to write and I'm a constant reader. On holiday I read a 300 page book in 24 hours. You'll usually find me with a book in hand and sometimes reading two books during the same period. I love socialising with my friends, going for a drink or a nice meal out and I like to keep fit - usually doing exercises classes. One of my favourite hobbies is cooking. 
11. What is your fave "thing" in the world?

Workwise - my laptop. It has everything on it and I've nearly had a breakdown when it's died on me (twice in the last three months). Sentimentally - my photos. My grandma, who passed away ten years ago, always kept loads of photo albums and I hope to do the same. (hope I interpreted that question right!)

My nominees!

Luscious Lane
Gingerly Pale

The Beauty Blogger
Rainbow Crush
The Human Mannequin
Locked in a Bow
Hester Lierre
Drained Beauty
Life of a Make Up Junkie
Chesire Cat Chats
She Wore Chic

My questions

1. What is the one beauty product you couldn't live without?
2. What's been the best thing about starting your blog?
3. Favourite book and why?
4. Top three things on your beauty wishlist?
5. Favourite memory?
6. Summer or winter?
7. What's the best thing been about summer 2013?
8. Top blogging tips?
9. Where is your dream holiday destination?
10. Do you have any tattoos/ want any tattoos?
11. Early morning person or night owl?


Can't wait to see the answers
Beth xx

Thursday, 5 September 2013

Benefit creaseless cream shadow


Benefit Creaseless Cream Shadow - My Two Cents *

I love Benefit products but unfortunately they're often out of my price range, that's why I was so pleased to find this eye shadow in my work experience goodie bag.
The creaseless cream shadows are part of the new Colour... by Benefit range, which also includes longwear powder shadow, ultra plush lipgloss and hydra-smooth lip colour.


My Two Cents is a soft, bronze colour which is perfect for everyday wear. I've worn it a few times now and find that although for a cream shadow it has good staying power, it lasts much longer when paired with an eye primer - I like to use Urban Decay's eyeshadow primer potion. The cream shadow is also great for creating a smoky eye I also like to layer the cream shadow with other neutral and dark brown shades from Sleeks' palette. I always think brown and bronze smoky eyes are much easier to pull than a harsh black and white. Plus a brown smoky eye is much more casual, taking you from work to bar without looking over or under done.


Prehaps my favourite thing about the Colour... By Benefit range though is the beautiful packaging. I love the little round box that my eyeshadow came in with it's green, blue and chocolate brown pattern. The eyeshadow itself comes in a lovely round pot, with a glass top which makes the eyeshadow look suspended in the middle and a ridged, plastic bottom.
There are ten shades n the creaseless cream shadow range, all of which are very wearable for any skin tone. Next on my wish list are Birthday Suit - a light creamy pink which would look great dabbed into the inner corner for a wide eyed look - and Bronze Have More Fun - a dark burnished bronze which would work well in the crease of the eye.

You can buy My Two Cents online here or at any Benefit counter for £15.50 

Beth xx

Decadent brownies


If you watched the Great British Bake Off on Tuesday you would have seen the bakers whip up some delicious dessert. My favourites were the petit fours that made up the Showstopper challenge but nothing says dessert to me like a decadent chocolate brownies, generously studded with milk and white chocolate chunks, served warm with a big dollop of vanilla ice-cream.
Making brownies hasn't always come easy to me. My first attempt was during a school cooking lesson where I added a tablespoon of baking powder instead of a teaspoon and then they exploded all over the inside of the oven. The next attempts created brownies that weren't rich and gooey, were too cake like in texture and, on one peculiar occasion, came out of the tin a reddy, brown colour.
This recipe has taken some perfecting but now it never fails to make the most gorgeous, squidgy brownies. I even took a box with me when I moved into uni halls and they really helped to break the ice.

You will need
  • 200g dark chocolate
  • 180g unsalted butter or Stork
  • 85g plain flour
  • 50g cocoa powder
  • 3 eggs
  • 275g caster sugar
  • 100g each of white chocolate and milk chocolate 
Try to get the best quality dark chocolate and cocoa powder you can afford as these give the brownie it's rich, deep chocolate flavour. If your budget is tight you can skimp a little on the milk and white chocolate and they are just extra bits. You can remove them completely if you prefer or replace them with the same amount of chopped nut - walnuts would work well

The next steps
  1. Put the cubed butter and broken up dark chocolate into a bowl over a saucepan on boiled water and make sure the bowl isn't touching the water. Leave the pan on a low setting (mark 2 for electric hobs) and leave the chocolate and butter to melt together. The trick is do it over a gentle heat so the chocolate doesn't split. Stir occasionally.
  2. While the chocolate is melting I like to prepare the other ingredients, so measure out your flour and cocoa powder and seive them into a small bowl. Chop up the milk and white chocolate into bitesize chunks, taking care not to let the knife slip on the chocolate.
  3. When the dark chocolate and butter have melted together to form a glossy dark brown liquid, take off the heat and leave to cool.
  4. Crack 3 large eggs into a bowl, add the sugar and whisk on the highest setting until it is thick, creamy and doubled in volume.
  5. When the dark chocolate mixture is cool, pour into the sugar and egg mixture and gently combine together. Then sift in the flour and cocoa and combine until you have a thick, unctuous batter. Sprinkle in the chocolate chunks and swiftly combine.
  6. Pour into a greased and lined tin and spread into an even layer. Bake in the middle shelf of the oven for anywhere between 25-35 minutes. It varies from oven to oven and from batter to batter. You want a brownie that is just set and starting to come away from the edge of the tin.
Enjoy warm with double cream or ice cream of cold with a cuppa. Anyway you like.

Beth xx

Monday, 2 September 2013

Mani Mondays: MUA Nail Constellations

MUA Nail Constellation in Pisces* and Rimmel Salon Pro Britpop*

Unfortunately I missed last week's Mani Mondays because I was away in North Devon for the bank holiday weekend. But never mind, I'm back this week with a really simple nail design thanks to MUA.
My friend gave me the Pisces Nail Constellation bottle as part of my birthday present back in May but this is the first time I've actually gotten round to using it. It's similar to Ciate's nail caviar but a lot more affordable at £3.00 a bottle. The tiny beads create stunning three dimensional nail art, I used them for an accent nail on each hand but with a steady hand you could draw a line of beads down the centre of each nail or place beads at random for a unique look.


Pisces is made of shiny silver, green and pink balls so I decided to pair them Britpop, from Kate Moss's Rimmel range, it's a dark teal colour - a cross between blue and green - so perfectly matches the green and silver balls. What I love about Nail Constellations is that you will never get the same look, even with nails done at the same times, because of the mixture of colours.


I will warn you they can be a little bit fiddly and messy so be sure to do this over a tray, I used an upturned box lid so I could easily tip the beads back into the bottle. Also this look won't last forever, the nail beads will drop off as time goes by so you might want to save the look for a special occassion. Luckily unlike glitter and sequin nail polishes, the beads are pretty easy to remove!


How to achieve this look

1) Prep your nails with a clear basecoat before painting on Britpop from Kate Moss's Rimmel range
2) Remove the cap from the Nail Constellation bottle and fill with the beads, while the polish is still wet take off the white cap and gently squeeze the beads onto your nails
3) Press the beads gently into your nail polish and then tap off the excess (it's best to do this over a tray so you tip the beads back into the bottle)
4) Finish off your other plain nails with another coat of Britpop and then a clear topcoat

If you like the Nail Constellations you can buy them online here or in your local Superdrug store

Beth xx